How to make REST api for android apps using mySql and php

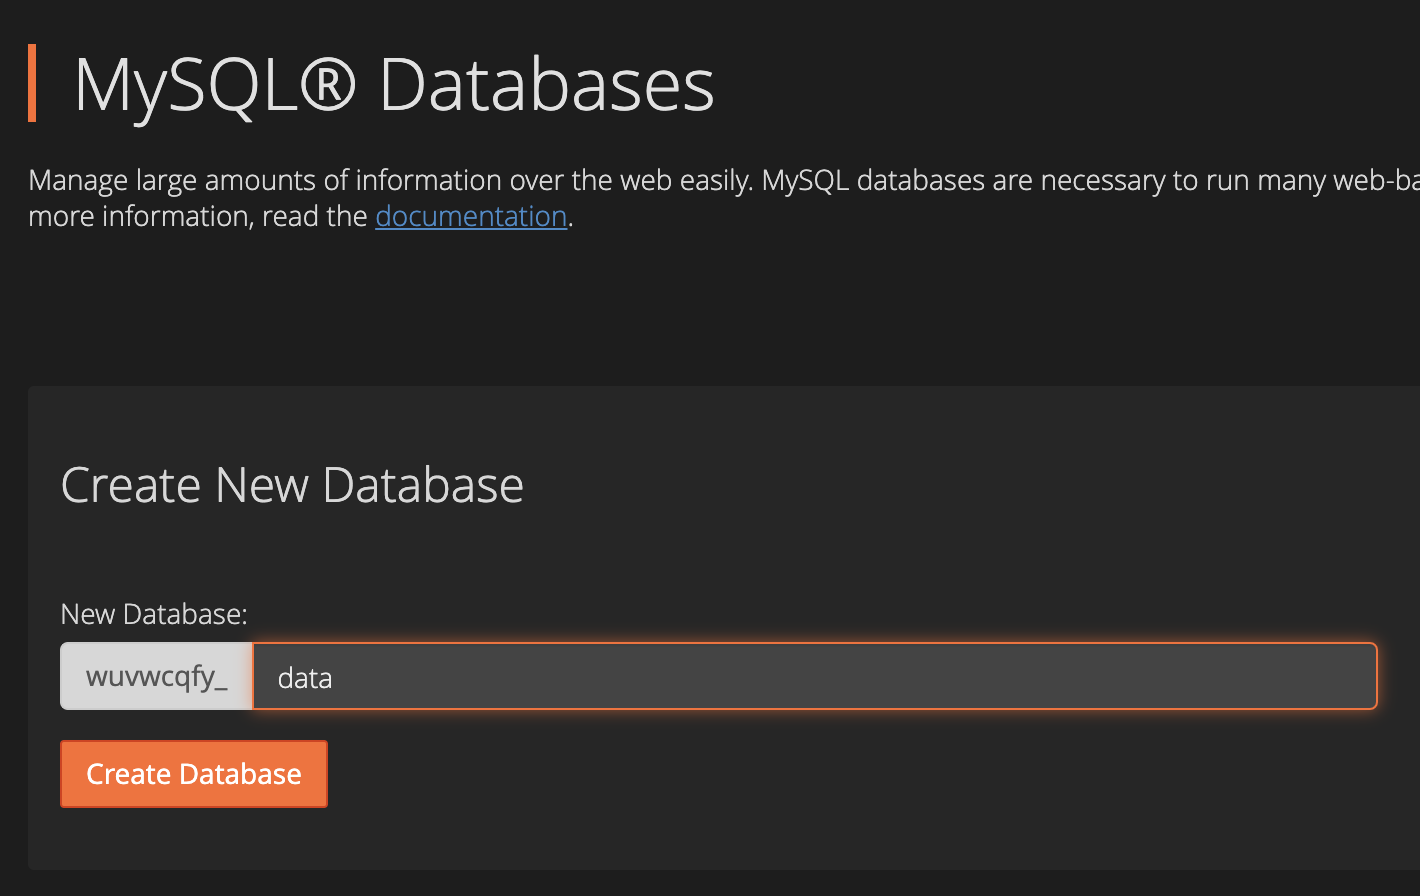
Go to the MySQL Databases section on the CPanel/Direct Admin or any other hosting. There you will find the above option or a similar one.After which, choose a name for your database and click create.
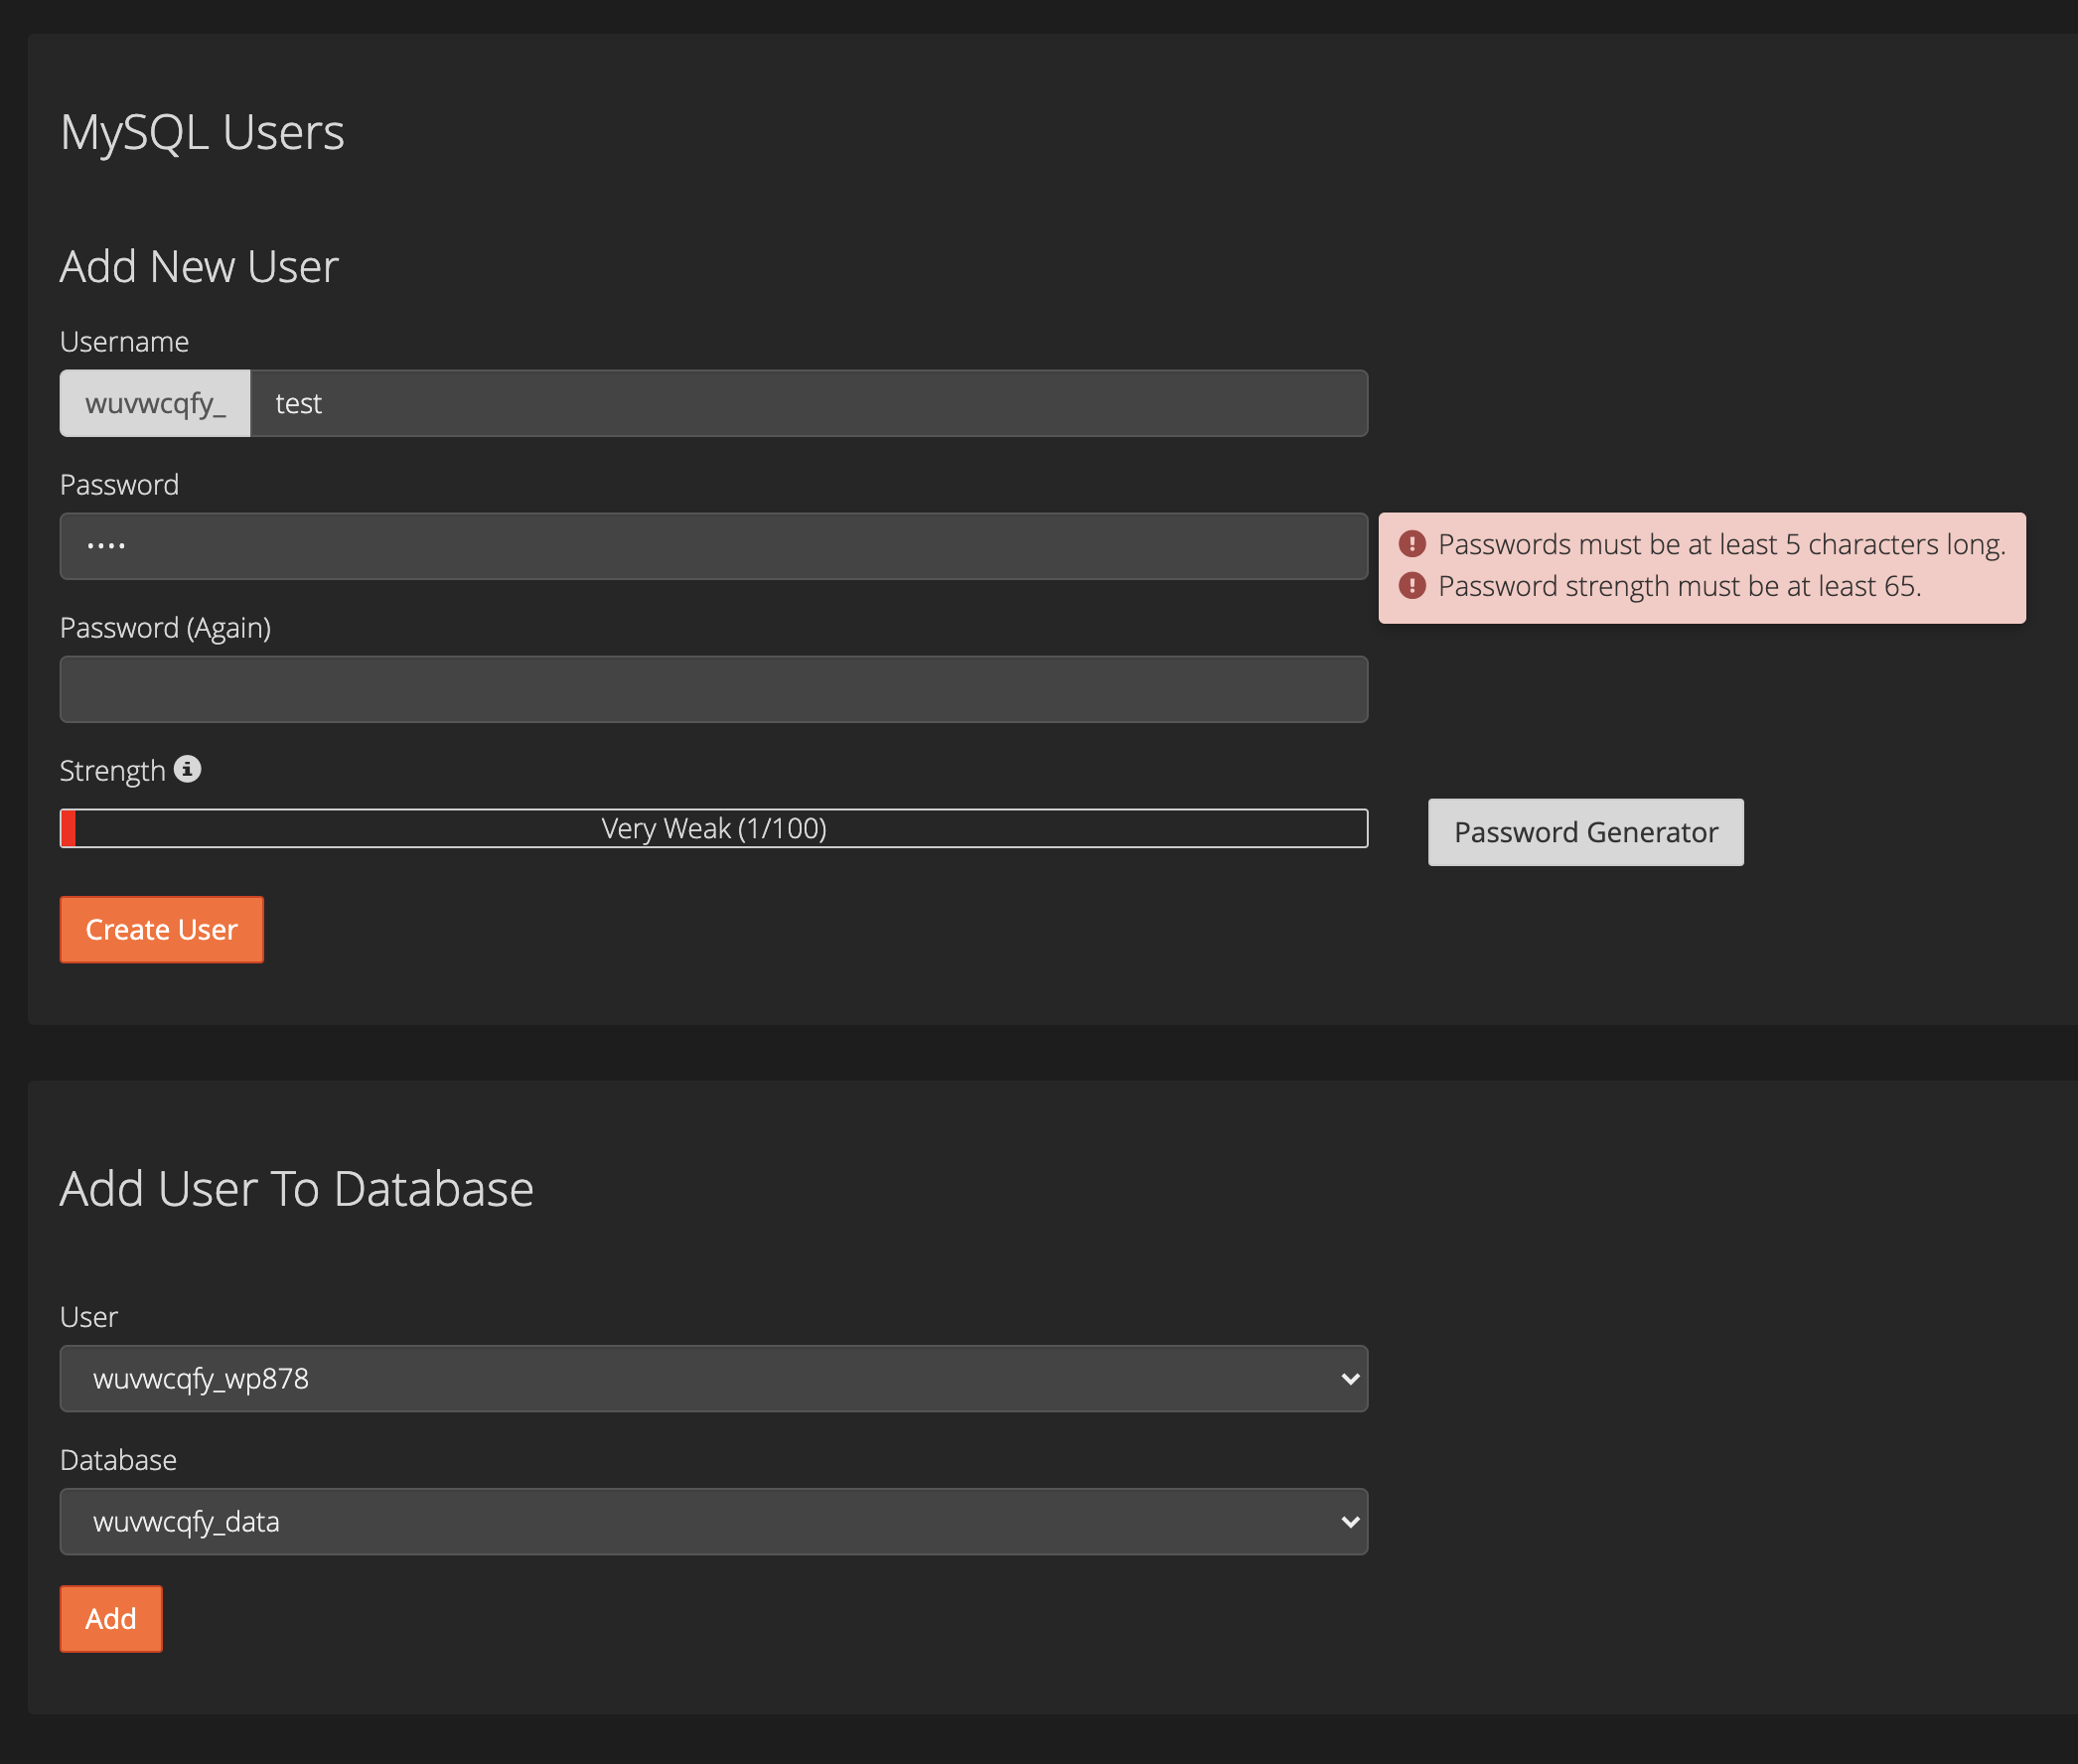
Create a new user by filling the required fields and click create user. After that choose the user and database and click add.
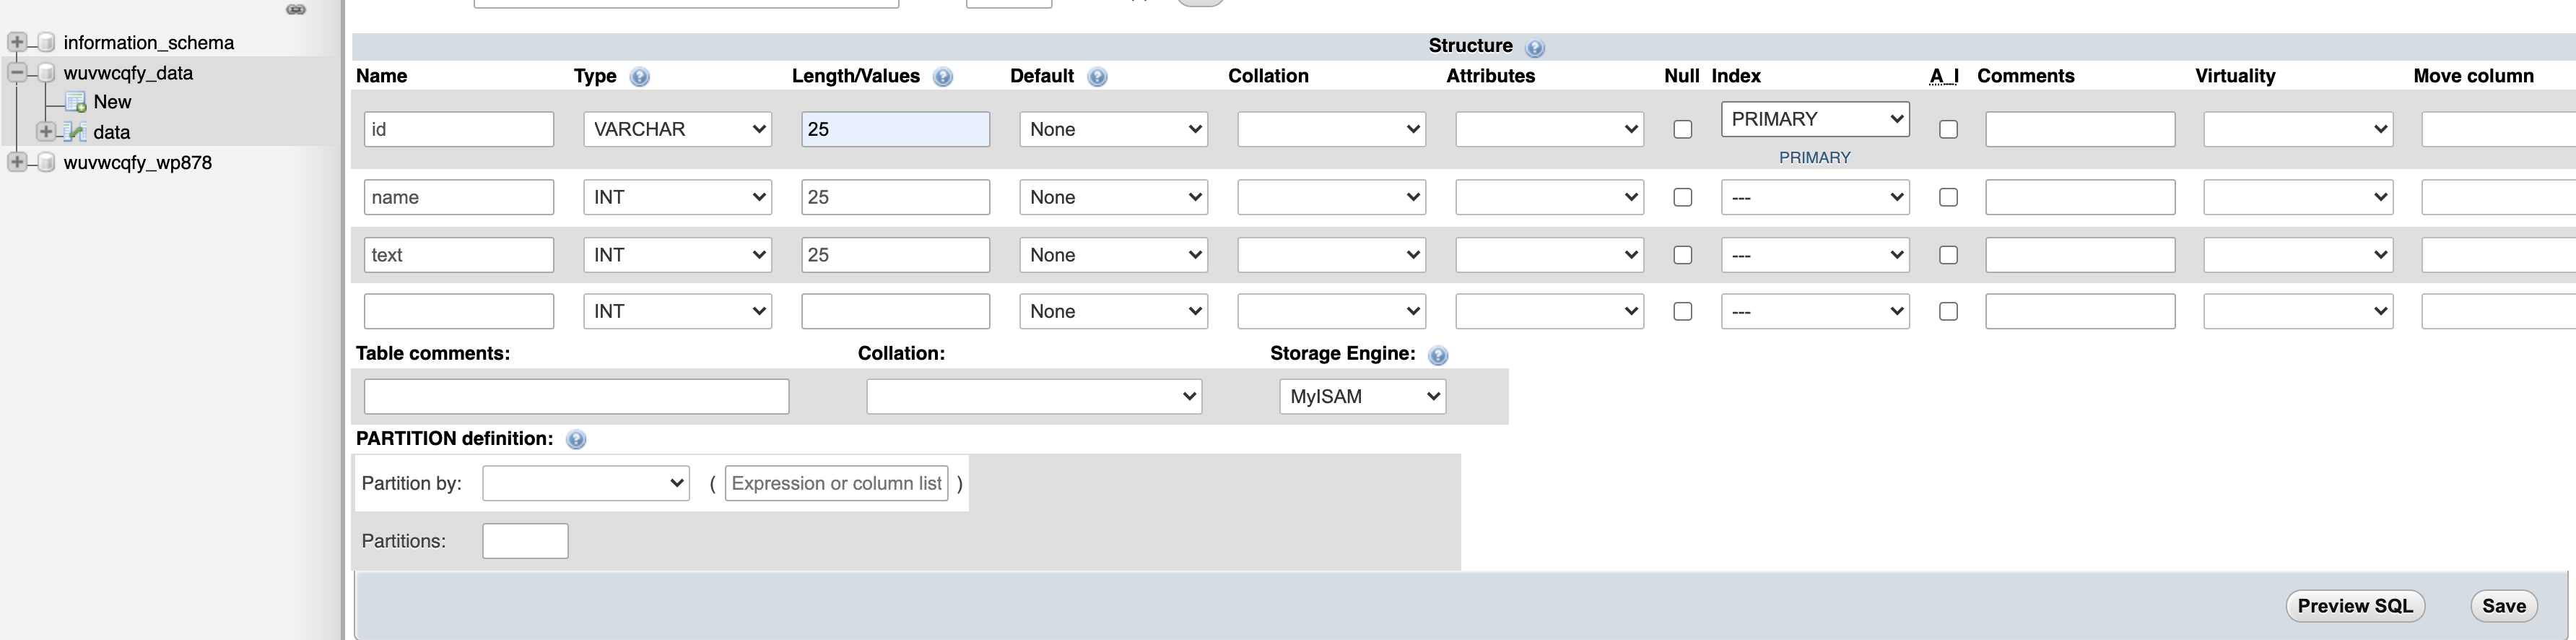
Go to phpMyAdmin section.
There you will see the name of the database you just created,Click on the little '+' sign next to it. After that Click on new
Next format the table structure in the fields you want.
First make an 'id' field set it as Primary tag.(Suggestion: Choose varchar and the length as required).
Now make rest of the required fields.
Click on save.
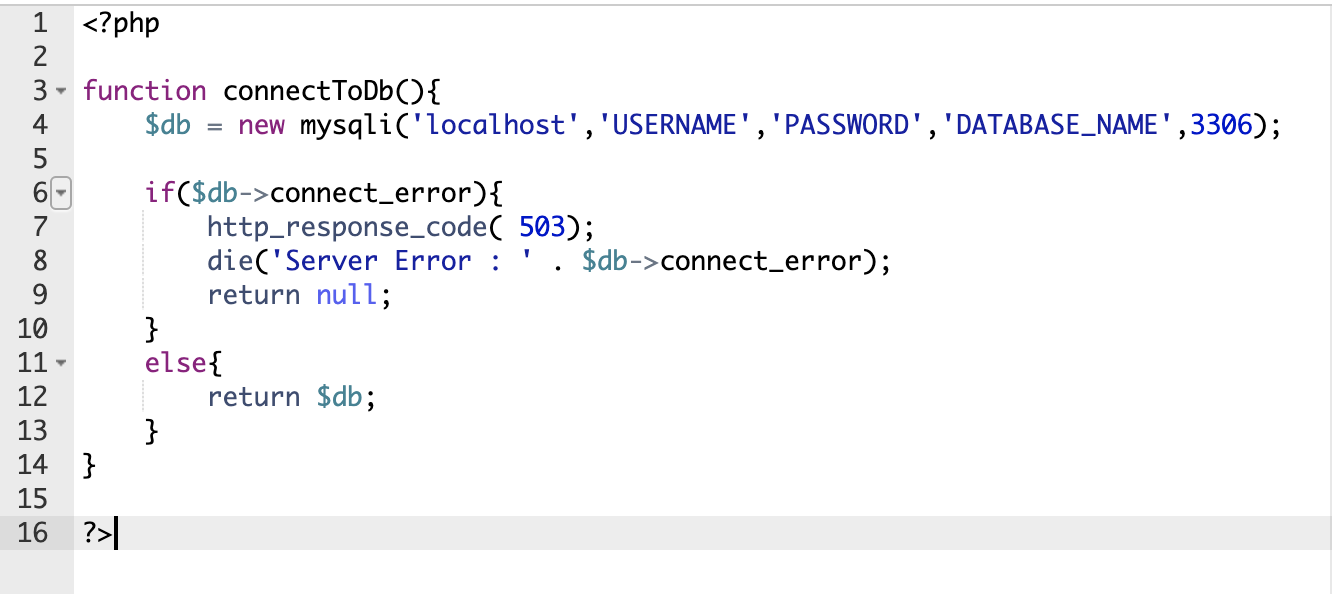
Go to File Manager and inside public_html create a file named getDatabase.php.
Write the code as shown in the above image.
Click on save.

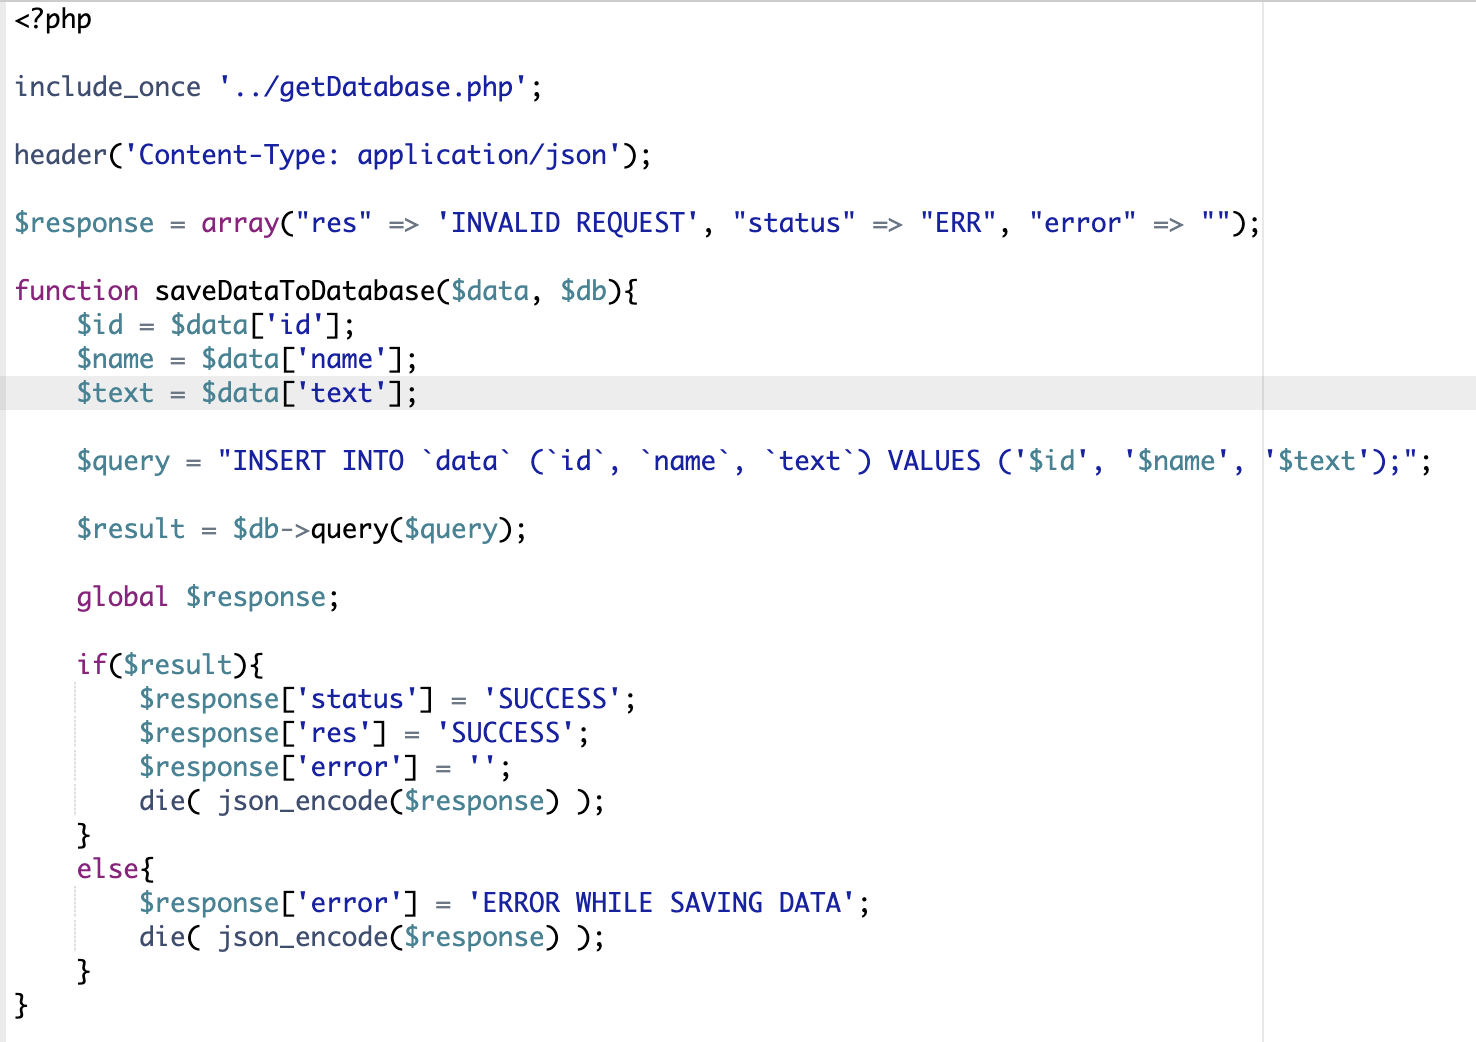
Create a new file named saveOnDatabse.php
Format the code in similar fashion to above to save data in the table.
Click on save.
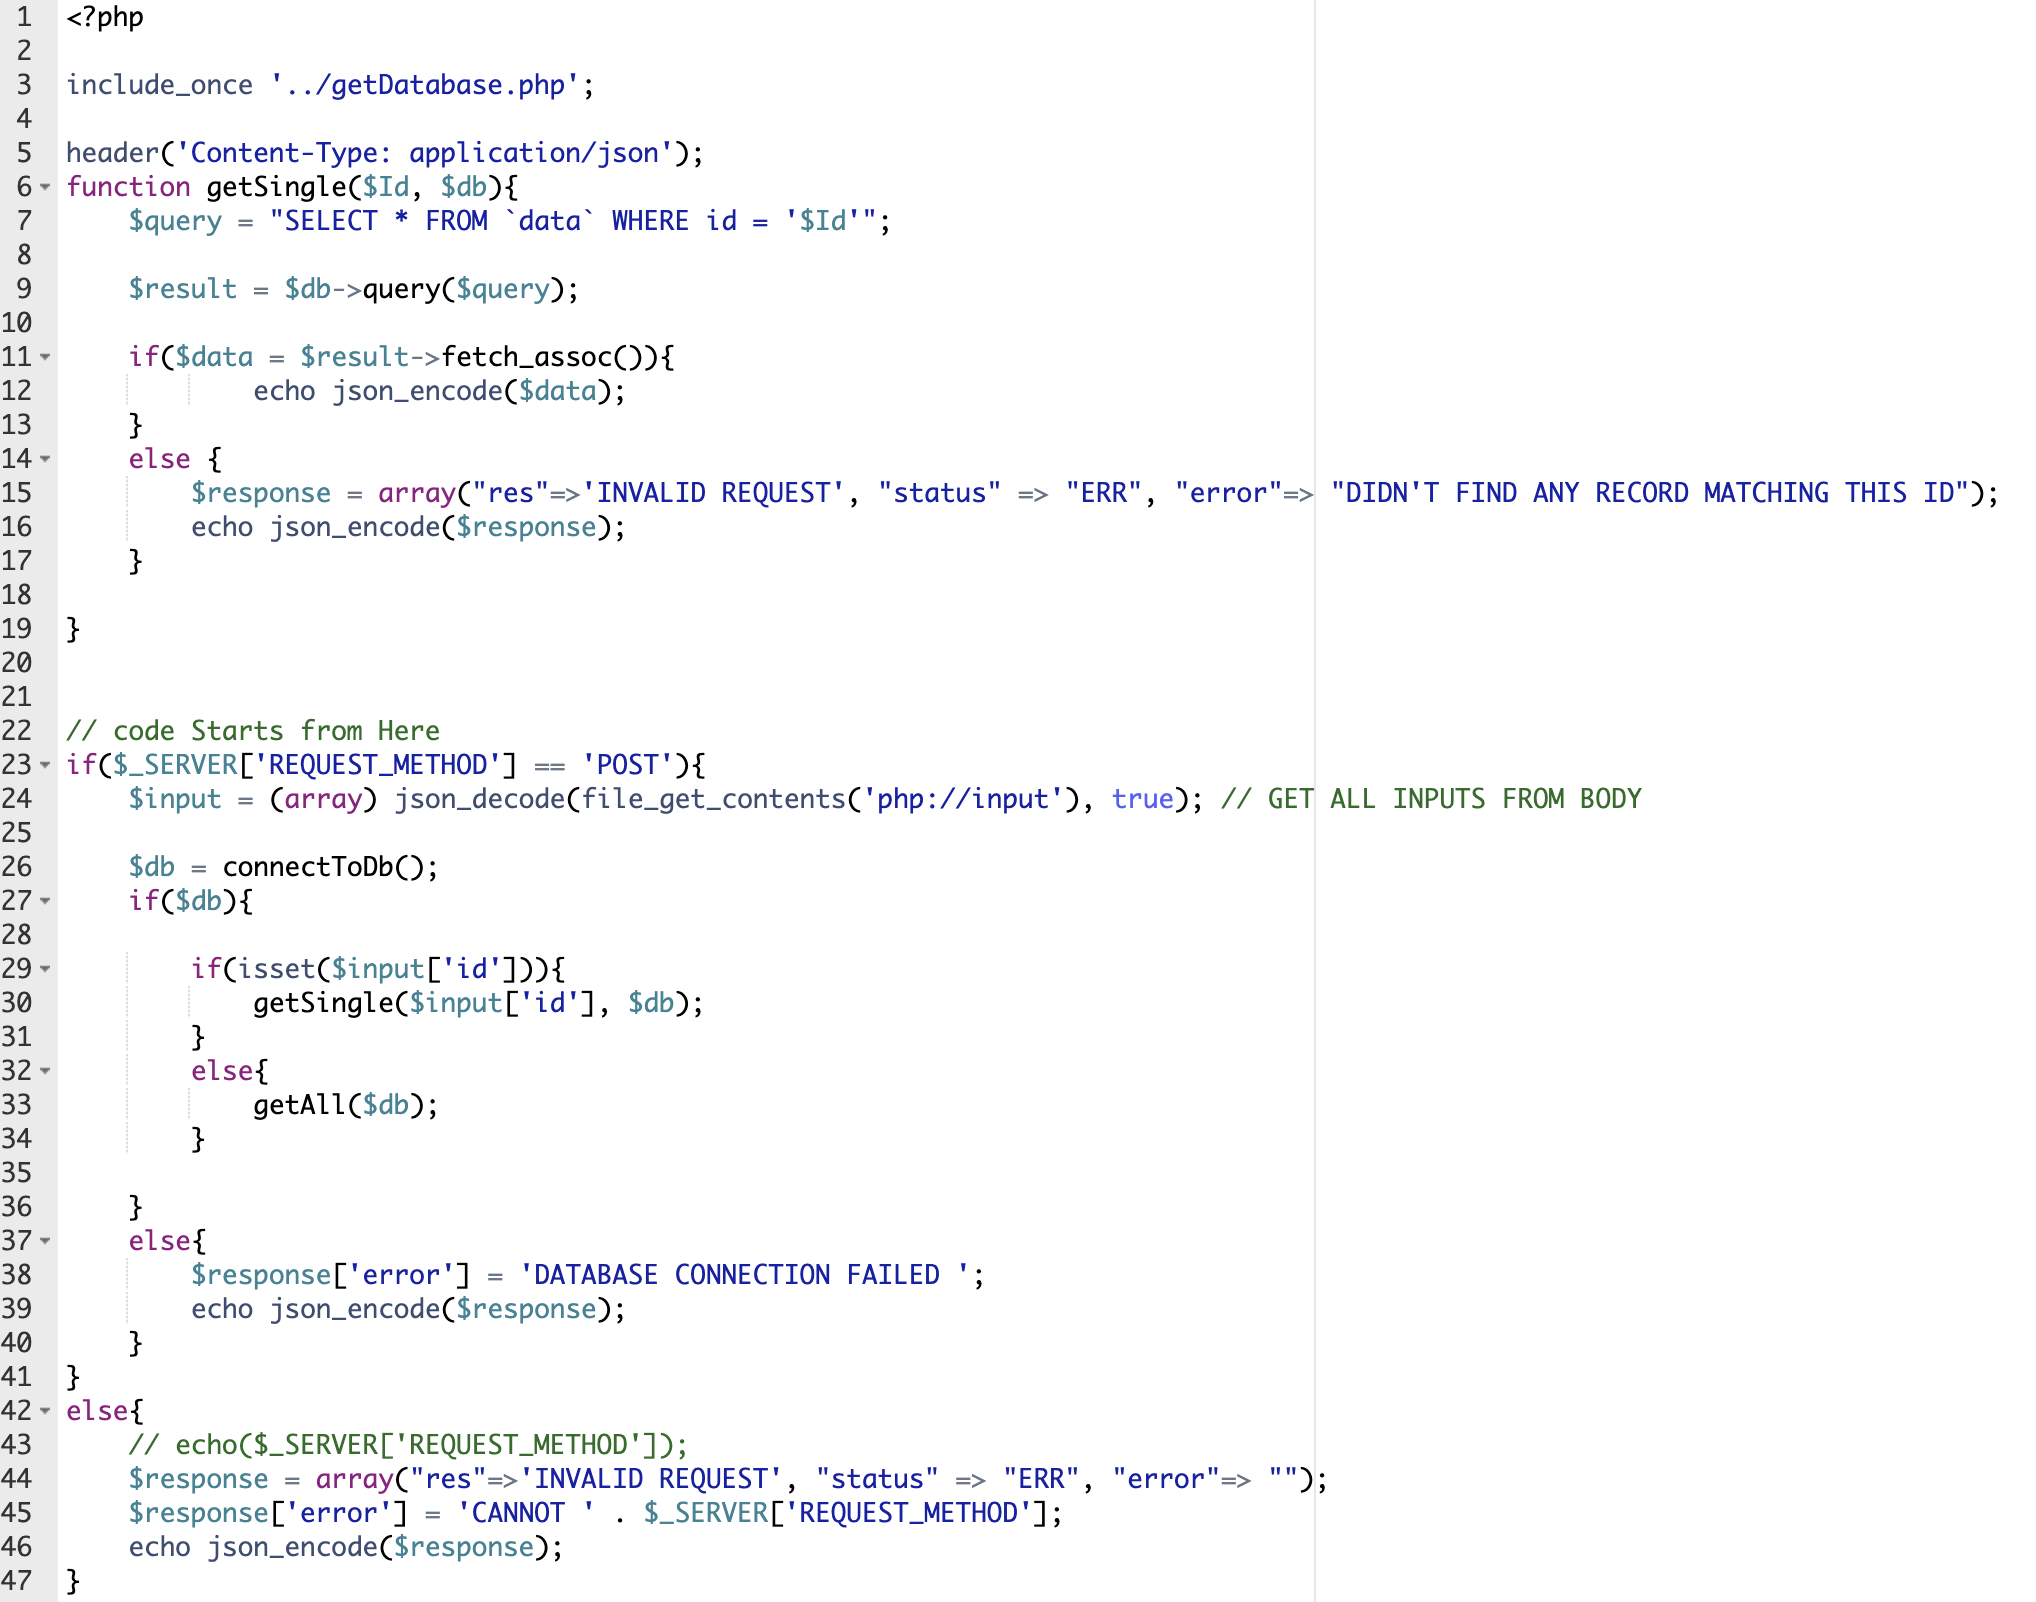
Create a new file named getFromDatabse.php
Format the code in similar fashion to above to fetch data from the table.
Click on save.

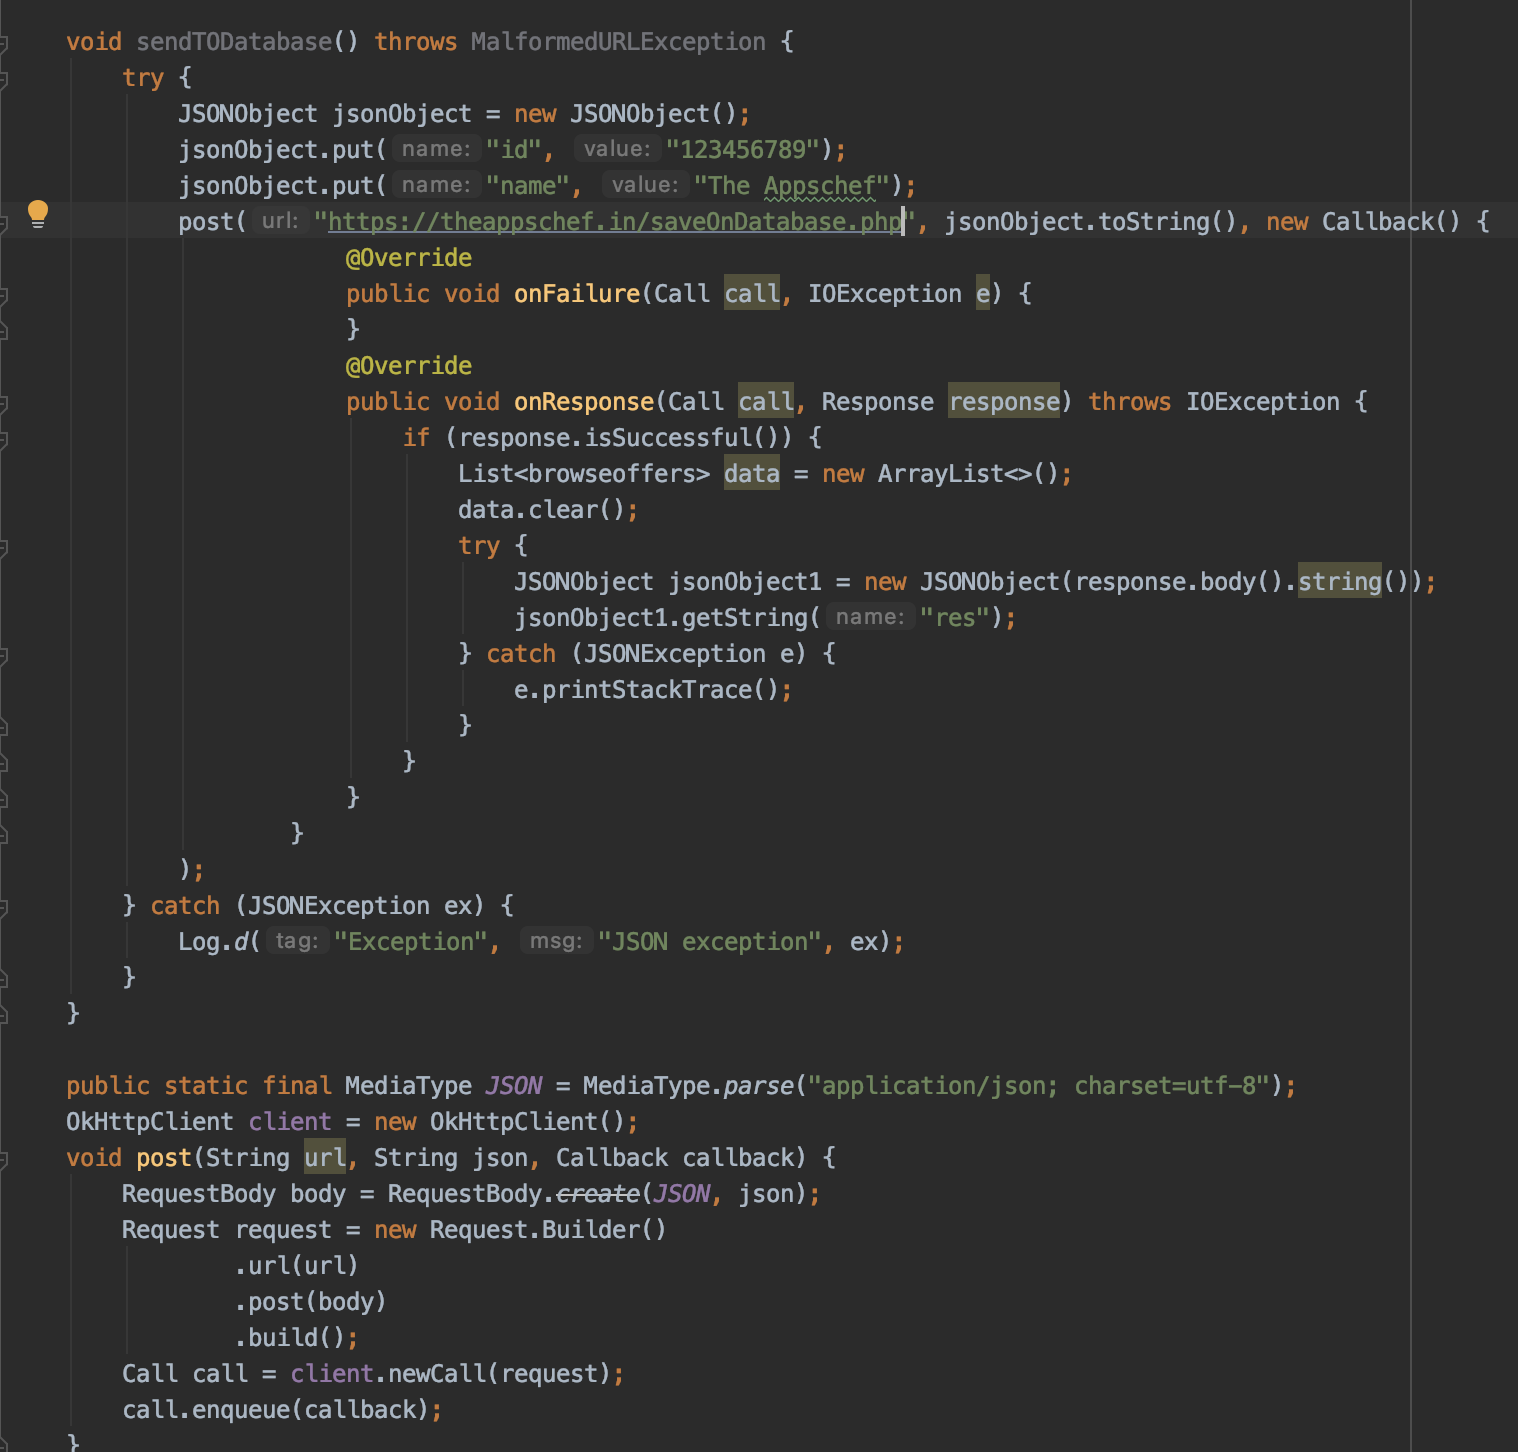
First go to build.gradle and implement (implementation 'com.squareup.okhttp3:okhttp:4.9.1')
Then use the above function to put the values in the json object and use call to send it to your code on the server.
Create a json object to store the response in a string and see if it' successfull or a failed.
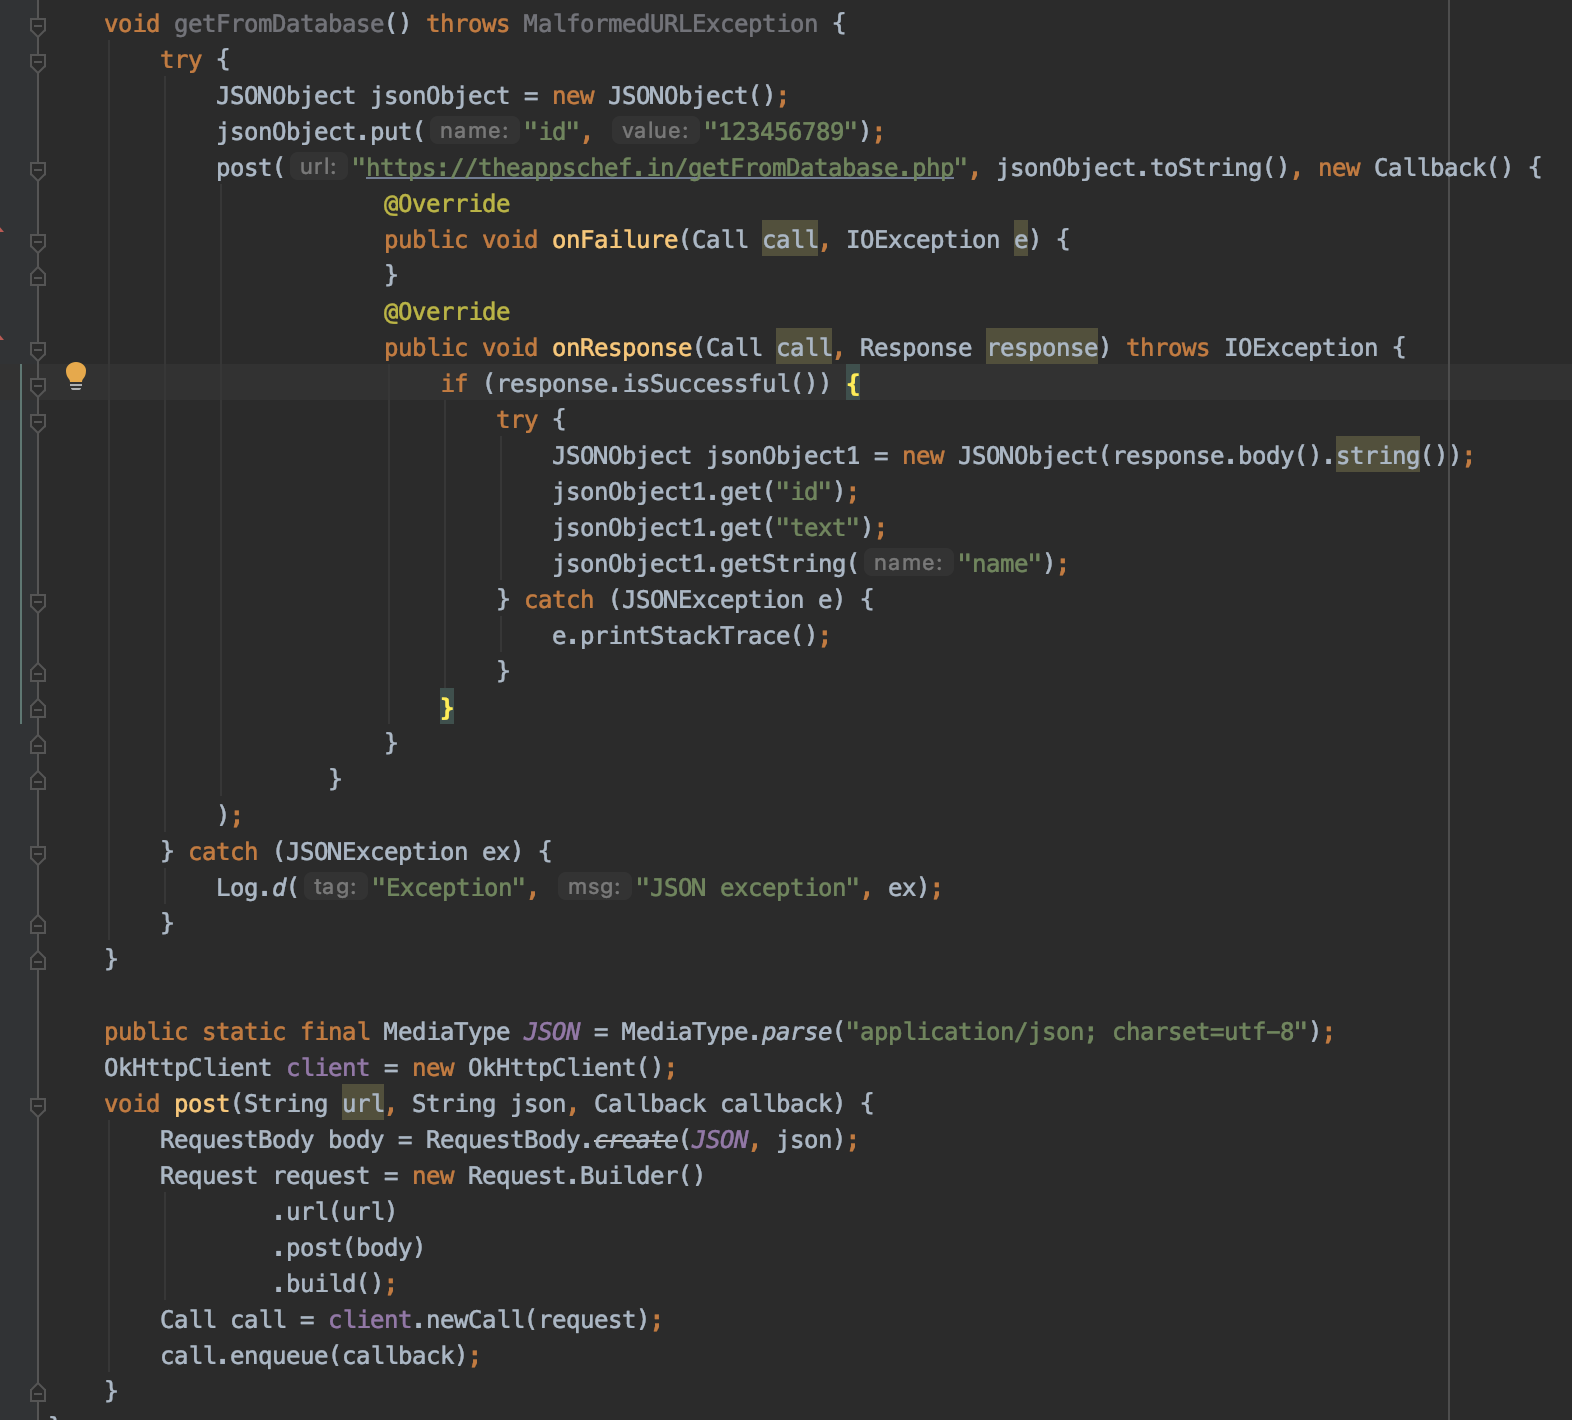
Send the id in json object to the getdata url.
It fetches the data and returns it in json format.
Now use the getString method to read the data and do what you will.